Superfudge–A Superfood! Really.


superfoodfudge

Continuing on with my penchant for sweets, here’s another tempting delight satisfies. This fudge is almost good enough to eat for breakfast, but if you’re like me, you’ll want to save it for dessert, so that you can look forward to it all day.


fudge1

So, what’s so SUPER about this? Here’s the lowdown:

  • Cashews (I made my own cashew butter from raw cashews): they’re loaded with magnesium, help to keep blood-sugar levels in check, reducing cravings and binges; they help to regulate energy levels, mood, but also prevent insulin resistance.

cashewbutter

  • Coconut oil: If you want to GLOW, you need fat–the healthy kind in foods like coconut oil. It has immune-boosting properties and its antiviral, antimicrobial, and anti fungal. By adding more of it to your diet may lead to a clearer face.
  • Raw cacao powder: (Choose raw cacao powder over regular because it is minimally processed.) High in antioxidants (flavonids) and has antidepressant effects.
  • Dates: benefits include relief from constipation, intestinal disorders, heart problems, anemia,  sexual dysfunction, diarrhea, abdominal cancer…
  • Goji berries: are among the highest antioxidant-containing foods. They are thought to fight heart disease, defend against cancer and diabetes, strengthen the immune system, improve vision, and enhance the complexion.
  • Chia seeds: are a good source of omega-3 fatty acids as well as loads of other antioxidants and other nutrients, such as iron and calcium; contain high concentration of fiber; rich in protein

P1000492

P1000490

P1000496

Amazingly Simple, No-Bake, Vegan Dessert: Maca Balls


macacover

I’ve been off refined sugar for about six months now. It’s a difficult road to recovery, but well worth it in terms of how I feel and the deleterious effects that sugar seems to wreak on my skin (think inflammation). As a recovering sugar fanatic (I once went to the dentist and was told that I had 13 cavities and a root canal–in one visit!), I need something, anything sweet before I go to bed. I’ve tried a bunch of alternative snacks, but since I discovered these beauties, they’ve become my mainstay. They are extremely simple to make, require few ingredients, are healthful, and satiate my sweet tooth. They include not one, but THREE superfoods: raw cacao powder, goji berries, and maca powder. Here’s are some fast facts on each of these three superfoods.

  • Raw cacao powder: (Choose raw cacao powder over regular because it is minimally processed.) High in antioxidants (flavonids) and has antidepressant effects.
  • Goji berries: are among the highest antioxidant-containing foods. They are thought to fight heart disease, defend against cancer and diabetes, strengthen the immune system, improve vision, and enhance the complexion.
  • Maca powder: is a Peruvian root reported to increase stamina and help the body better adapt to stress. They’re also reported to increase libido, but I’m not going there…

macaballs

ingredientscombinedrolledBest of all? Because they are so quick to make, there’s instant gratification.

Yogaopolis: Yoga Asana Cookies–Better Late Than Never


P1000658

It’s been TOO long and I’ve made too many shareable delights to delay any longer. One of my favorites from December is my batch of yoga asana cookies. As adorable as they were for the Yuletide season, I think they’ll be even cuter for Valentine’s Day when I outline the gingerbread men in pink. See for yourself…

Firstly, here are the cookie cutters, available at Baked Ideas. I opted for the ten piece set, but you can buy them in sets of five.

P1000633

Here’s the progression of dough to naked gingerbread men…

P1000634

P1000639

…followed by piping of royal icing…

P1000642

…individually wrapped in baggies for gift giving…

P1000648

…and pictures of a few of the individual asanas…

Corpse pose
Corpse Pose
Plow Pose
Plow Pose
Lotus Pose
Lotus Pose
Side Angle Twist
Side Angle Twist
P1000650
Tree Pose
Full Wheel Pose
Full Wheel Pose

…and as decorations in my kitchen…

P1000661

P1000667P1000674

I used Cook’s Illustrated’s Thick and Chewy Gingerbread Cookie Recipe, which I always use with great results.

For about twenty 5-inch gingerbread people or thirty 3-inch cookies

3 cups all-purpose flour
3/4 cup firmly packed dark brown sugar
1 tablespoon ground cinnamon
1 tablespoon ground ginger
1/2 teaspoon ground cloves
1/2 teaspoon salt
3/4 teaspoon baking soda
12 tablespoons (1 1/2 sticks) unsalted butter, cut into 12 pieces and softened slightly
3/4 cup unsulphured molasses
2 tablespoons milk

1. In food processor workbowl fitted with steel blade, process flour, sugar, cinnamon, ginger, cloves, salt, and baking soda until combined, about 10 seconds. Scatter butter pieces over flour mixture and process until mixture is sandy and resembles very fine meal, about 15 seconds. With machine running, gradually add molasses and milk; process until dough is evenly moistened and forms soft mass, about 10 seconds. Alternatively, in bowl of standing mixer fitted with paddle attachment, stir together flour, sugar, cinnamon, ginger, cloves, salt, and baking soda at low speed until combined, about 30 seconds. Stop mixer and add butter pieces; mix at medium-low speed until mixture is sandy and resembles fine meal, about 1 1/2 minutes. Reduce speed to low and, with mixer running, gradually add molasses and milk; mix until dough is evenly moistened, about 20 seconds. Increase speed to medium and mix until thoroughly combined, about 10 seconds.

2. Scrape dough onto work surface; divide in half. Working with one portion of dough at a time, roll 1/4-inch thick between two large sheets of parchment paper. Leaving dough sandwiched between parchment layers, stack on cookie sheet and freeze until firm, 15 to 20 minutes. (Alternatively, refrigerate dough 2 hours or overnight.)

3. Adjust oven racks to upper- and lower-middle positions and heat oven to 350 degrees. Line two cookie sheets with parchment paper.

4. Remove one dough sheet from freezer; place on work surface. Peel off top parchment sheet and gently lay it back in place. Flip dough over; peel off and discard second parchment layer. Cut dough into 5-inch gingerbread people or 3-inch gingerbread cookies, transferring shapes to parchment-lined cookie sheets with wide metal spatula, spacing them 3/4 inch apart; set scraps aside. Repeat with remaining dough until cookie sheets are full. Bake cookies until set in centers and dough barely retains imprint when touched very gently with fingertip, 8 to 11 minutes, rotating cookie sheets front to back and switching positions top to bottom halfway through baking time. Do not overbake. Cool cookies on sheets 2 minutes, then remove with wide metal spatula to wire rack; cool to room temperature.

5. Gather scraps; repeat rolling, cutting, and baking in steps 2 and 4. Repeat with remaining dough until all dough is used.

P1000665

Rosemary-Olive Oil Bread Made with Sourdough Starter


P1000098

If you’ve come this far with the sourdough starter, then this is a bread walk. If you’d like to bake this AMAZING bread, click here for the sourdough starter that you’ll need to make first. It only takes fifteen days to make it, but who’s counting.

Ingredients:

  • 2 pounds plus 2 ounces unbleached white bread flour, plus extra for dusting
  • 1/2 cup raw wheat germ
  • 3 1/2 teaspoons sea salt
  • 1 tablespoon finely chopped fresh rosemary
  • 4 tablespoons extra-virgin olive oil

Day 1
Place water, sourdough starter, flour, and wheat germ in the bowl of a mixer fitted with a doth hook. Mix on low speed for 4 minutes. The dough should be sticky and pliable. Cover the dough and allow it to rest 20 minutes.

Add salt and continue mixing on medium speed for 4 minutes, scraping down the side of the bowl as necessary with a rubber spatula.

Add rosemary and olive oil and mix on medium speed until ingredients are incorporated and the dough reaches an internal temperature of 78 degrees F, about 5 more minutes.

Remove the dough from the mixing bowl and lightly coat it with vegetable oil. Return the dough to the oiled bowl, cover in plastic wrap, and let it ferment at room temperature until it doubles in volume, about 3 to 4 hours.

Uncover the dough and turn it out onto a  lightly floured work surface. Cut the dough into two equal pieces. Slap each piece against the work surface to deflate. Tuck under the edges of each piece, cover the dough with a cloth, and let it rest for 15 minutes.

Uncover the dough and round each piece into a boule. Place the boules, smooth side down, into a bowl (unless you have proofing baskets). Cover the dough in the bowl with a cloth and let proof at room temperature until it begins to show signs of movement, about 1 1/2 to 2 hours.

Remove the cloth and sprinkle the surface of the dough with flour. Wrap each bowl tightly in plastic wrap. Refrigerate for 8 to 12 hours.

Day 2

Remove the boules from the refrigerator, take off plastic wrap, and cover each with a cloth. Let the dough continue proofing at room temperature until it reaches an internal temperature of 58 degrees F, about 2 to 2 1/2 hours.

Preheat oven to 500 degrees F at least one hour before baking.

Remove the cloth and lightly dust boules with flour. Carefully loosen boules from bowls and gently invert onto lightly floured baker’s peel.

With a single-edged razor held perpendicular to the boule, slash a tic-tac-toe pattern on top of each.

P1000095

Open the oven door, spritz the oven heavily with water from a spray bottle, and quickly close the door. Open the oven door again, slide the boule onto the pizza stone, and quickly close the door. Cut, spritz, and load the second boule in the same manner.

Reduce the oven temperature to 450 degrees F. Spritz the oven two more times during the next 5 minutes. Refrain from opening the oven door for the next 20 minutes.

After 20 minutes, check the boules and rotate them if necessary to ensure even baking. Continue baking for 15 to 20 minutes more, for a total of 40 to 45 minutes.

Remove boules to a cooling rack. The finished boules will have a rich brown color and look swollen.

P1000104

P1000102

Succumbing to Mt. Sourdough in Two Hundred Easy Steps


P1000119

Making a sourdough starter is serious business–the type that requires you to quit your job or at least be able to devote almost a month of time towards its care and feeding. Alright, so this recipe may not take two hundred steps, but it’s pretty close.

You see, I devoted a month of my summer and my life (and the bread is now since long gone…) to the care and feeding of Nancy Silverton’s sourdough starter with the intention to make a bounty of rosemary olive oil boules and fougasse. The starter and the breads were no easy feat, but the process and the finished products were well worth the efforts.

Step 1, Making the Starter

The starter takes fifteen days! Seriously! But it’s worth the effort to say you’ve done this (at least once in your life).

Ingredients:

  • 1 pound pesticide-free organic red or black grapes, unwashed
  • about 4 cups water, approximately 78 degrees
  • 1 pound 3 ounces (about 3 3/4 cup) unbleached white bread flour

Day 1:

P1000015

P1000019

P1000020


  • Place a bunch(es) of grapes on large double-layered piece of cheesecloth. Tie opposite corners together to form a bag around grapes. Combine water and flour in 1-gallon container and stir with rubber spatula until evenly moistened. Hold cheesecloth-wrapped grapes over container and squeeze them lightly with your hand, allowing juices to fall into container. Place grapes in container; use rubber spatula to stir mixture and then fully submerge grapes. Cover container with plastic wrap. Let container stand at room temperature (70 to 75 degrees).

Days 2 to 3:

P1000022

P1000032
Here it was starting to get stinky. It almost looks like I’m growing organs.
  • Mixture should form bubbles.

Day 4:

P1000033

P1000037
Very gaseous smelling.


  • Mixture should form large bubbles and smell alcoholic. Refresh mixture by stirring in 1 cup flour and 1 cup water, about 78 degrees. Replace cover and continue to let stand at room temperature.

Days 5 to 9:

P1000070

  • Mixture may appear separated, with liquid rising to top. If mold forms, remove it, then stir in 1 cup flour and 1 cup water.

Days 10 to 14:

P1000071

P1000072

  • (Triple daily feeding begins.) In morning, remove bag of grapes, squeezing to extract liquid; discard grapes. Stir mixture well, then pour off and discard all but about 2 cups (amount you discard can be reserved and turned into additional starters, if desired). First feeding: Stir in 1 1/4 cups flour and 1 cup water, about 78 degrees. Cover and let stand at room temperature 4 to 6 hours. Second feeding: Stir in 2 1/2 cups flour and 2 cups water, about 78 degrees. Cover and let stand at room temperature 4 to 6 hours longer. Third feeding: Stir in 5 cups flour and 4 cups water, about 78 degrees. Cover and let stand at room temperature for 12 to 15 hours. Repeat process next 4 days, pouring off all but 2 cups before feeding begins.

Day 15:

P1000073

  • Starter is ready to use; it should form bubbles and should smell yeasty and nutty.

Here’s the good news: once you have the starter, you can store it away in your refrigerator until you have another summer off or perhaps until Christmas vacation when you’ll have a couple of weeks to devote to the feeding schedule again.


If you’re still with me after day 15, you’ve only got THREE more days until you get your first loaf.

Up next, Rosemary-Olive Oil Bread…

P1000102

Pizza Pilgrimage: Sally’s Apizza, New Haven, Connecticut


photo_1
Waiting in line
Anxiously awaiting
Anxiously awaiting

As the end of summer approaches (code speak for returning to work/school), Raj and I thought we’d make one last trip to visit family in Connecticut while setting off to accomplish something that we attempted five short years ago. You see, the last time we took this same trip, we stood in line at Sally’s for one and a half hours with no end in sight, grumpily standing in the hot, humid, unforgiving Connecticut afternoon. We got to the point where Raj broke and my dad and uncles weren’t much help either, regaling us in stories of gruff and unattractive servers, dirty bathrooms, and so-so pizza. We questioned whether the wait was worth it. I was ready to wait it out, but Raj raised the flag and we headed to Ernie’s, my dad’s favorite, which was fine, but left us with some unfinished business.

For those of you not in the know, Sally’s is one of the best pizza places in the country. It’s repeatedly in the top 10 lists year after year: http://www.usatoday.com/story/travel/destinations/2013/11/30/best-pizza-in-america/3785309/.  Sally’s (number 7 on the list) and Pepe’s (number 1) are both on Wooster Street in New Haven’s Little Italy. Pepe’s pizza is known for its ‘white clam pie’  while Sally’s for their ‘tomato pie.’ Sally’s was actually an offshoot of Pepe’s– nephews Salvatore (Sally) and Tony Consiglio, who worked for Pepe as teenagers, left in 1938 to open Sally’s.

We got to Sally’s strategically on a Sunday night at around 6pm. The line was about 20 deep, not too bad, not too good. We waited about 45 minutes until we were directed into a booth by the host who served as our waiter too. Sally’s is small and dark and not particularly nice (bring hand sanitizer). It probably looks the same today as it did 76 years ago, minus the upgrade sometime in the 1950’s when they added some spectacular lighting fixtures (I tried taking a picture of the fixtures, but my iPhone didn’t do the vintage glass justice). We sat below the aging picture of Frank Sinatra, appropriately crooked and covered in grime.

photo_2 copy

photo_1 copy 2

photo_5

photo_3 copy
Tomato pie
photo_5 copy
Pepperoni pie

The service is legendary and lived up to its name. Sally’s is no frills and devoid of customer service, but that’s the appeal–it’s all about the pie. Nothing more. We ordered two pies:  tomato (tomato sauce, no cheese) and pepperoni. Both were excellent: the crust was perfect–thin and not too burnt, and the sauce was slightly sweet.

We walked away full and elated, down the block to the Italian bakery to finish off the night with a cannoli. Perfection!

photo_2


photo_4

With Sally’s off the list, next time we will pay homage to Pepe’s, hopefully sooner than five years from now.

photo_4 copy


Squash Blawesome (Blossom) & Burrata Pizza


P1000080


P1000078

Continuing on the quest to expand our pizza horizons, I took advantage of our local farmers market for inspiration and found two items that I absolutely love: squash blossoms and burrata cheese.

P1000085

For this pizza, I used the same Mozza pizza dough and Passata di Pompodoro (see previous post for recipe), and added squash blossoms (stamens removed) and topped it off with locally produced burrata cheese.

Squash Blossom and Burrata Pizza

Ingredients

•1 round of pizza dough

•1 tablespoon extra virgin olive oil

•Kosher salt

•1/4 cup Passata di Pompodoro

•About one dozen squash blossoms, stamens removed

•Finishing quality extra virgin olive oil, about 1 tablespoon

•12 oz. burrata cheese

Directions

1. Prepare and stretch the dough and preheat oven to 500 degrees. Brush the rim of the dough with olive oil and season the entire surface with salt. Ladle the sauce onto the center of the dough, spreading out sauce leaving 1-inch rim without any sauce. Place the squash blossoms around the center of the pizza, on top of the Passata di Pompodoro.  Bake until the the crust is golden brown and crispy, about 8 to 12 minutes. Remove the pizza from the oven, scatter the burrata cheese on top, and cut into quarters. Drizzle the pizza with the finishing quality olive oil, and serve.

P1000087

P1000093


Pizzeria Mozza’s Margherita Pizza


P1000061

The Next Best Thing to Pizzeria Mozza’s Pizza

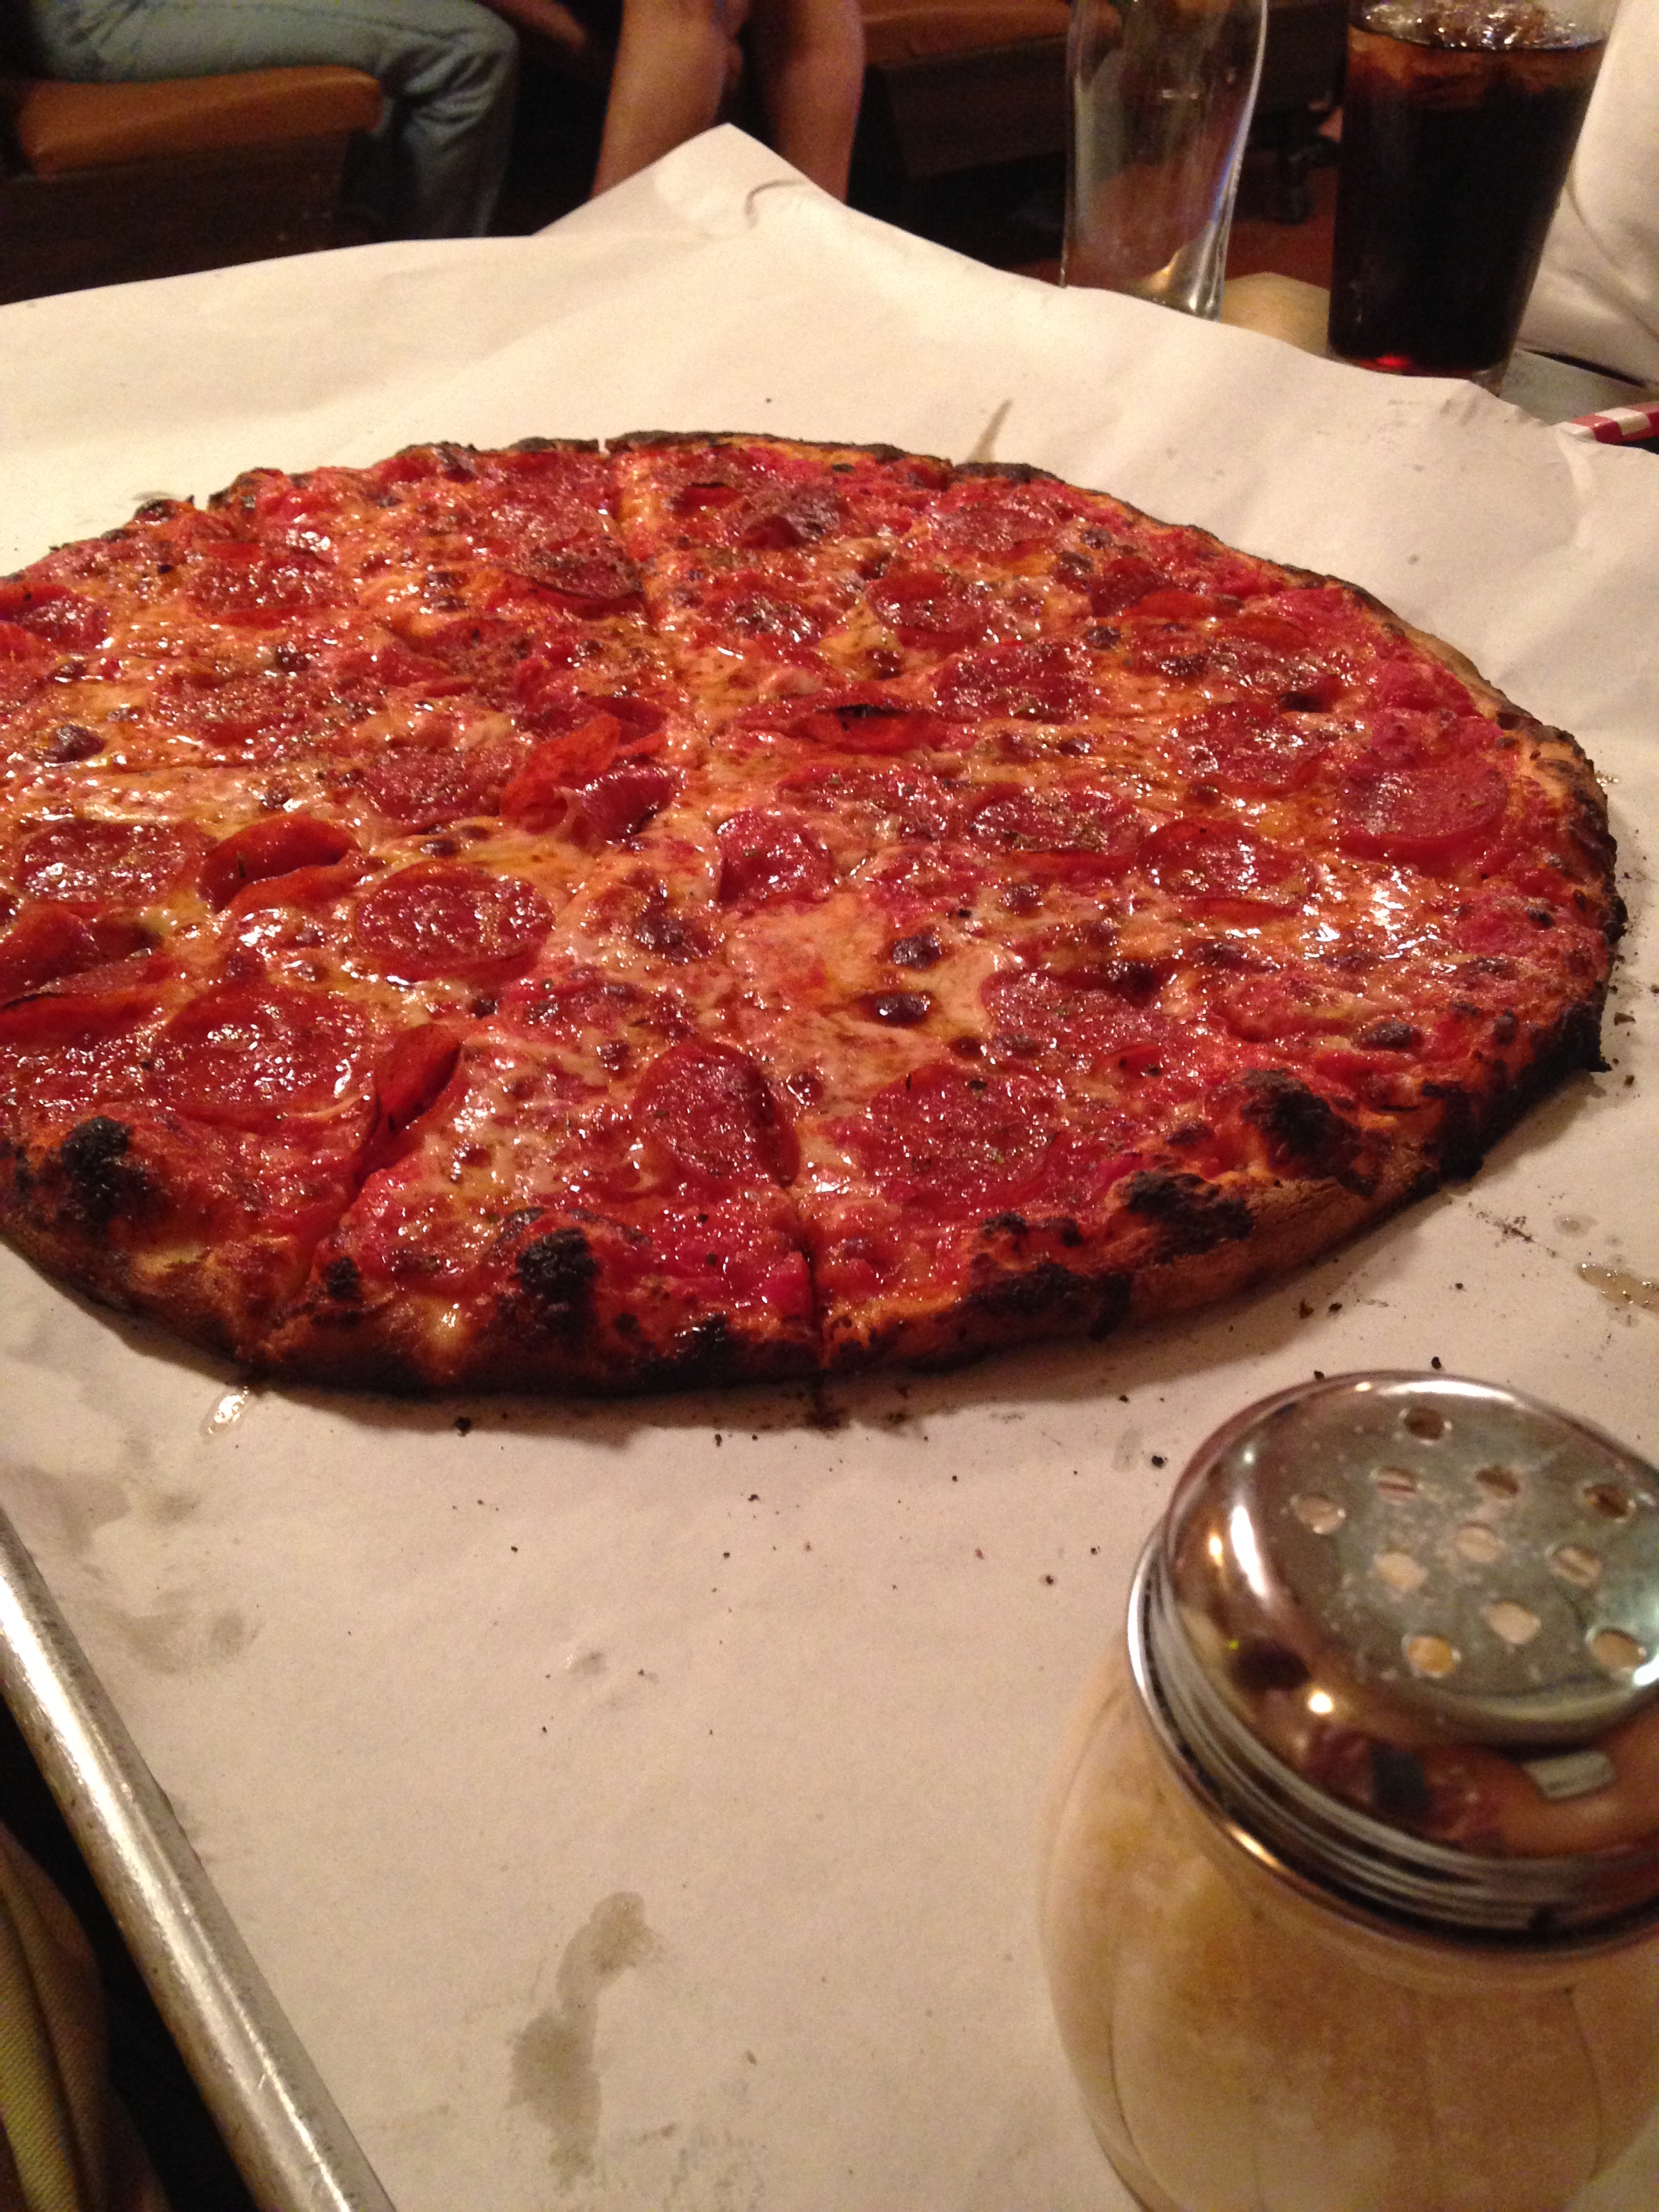
Now that I’m off for the summer, Raj has been on my back to up my pizza game. After ten years of our traditional ‘Friday Night Pizza,’ (red sauce, mozzarella ,and pepperoni) he’s been craving something different—a nicer way of saying he wants something better.

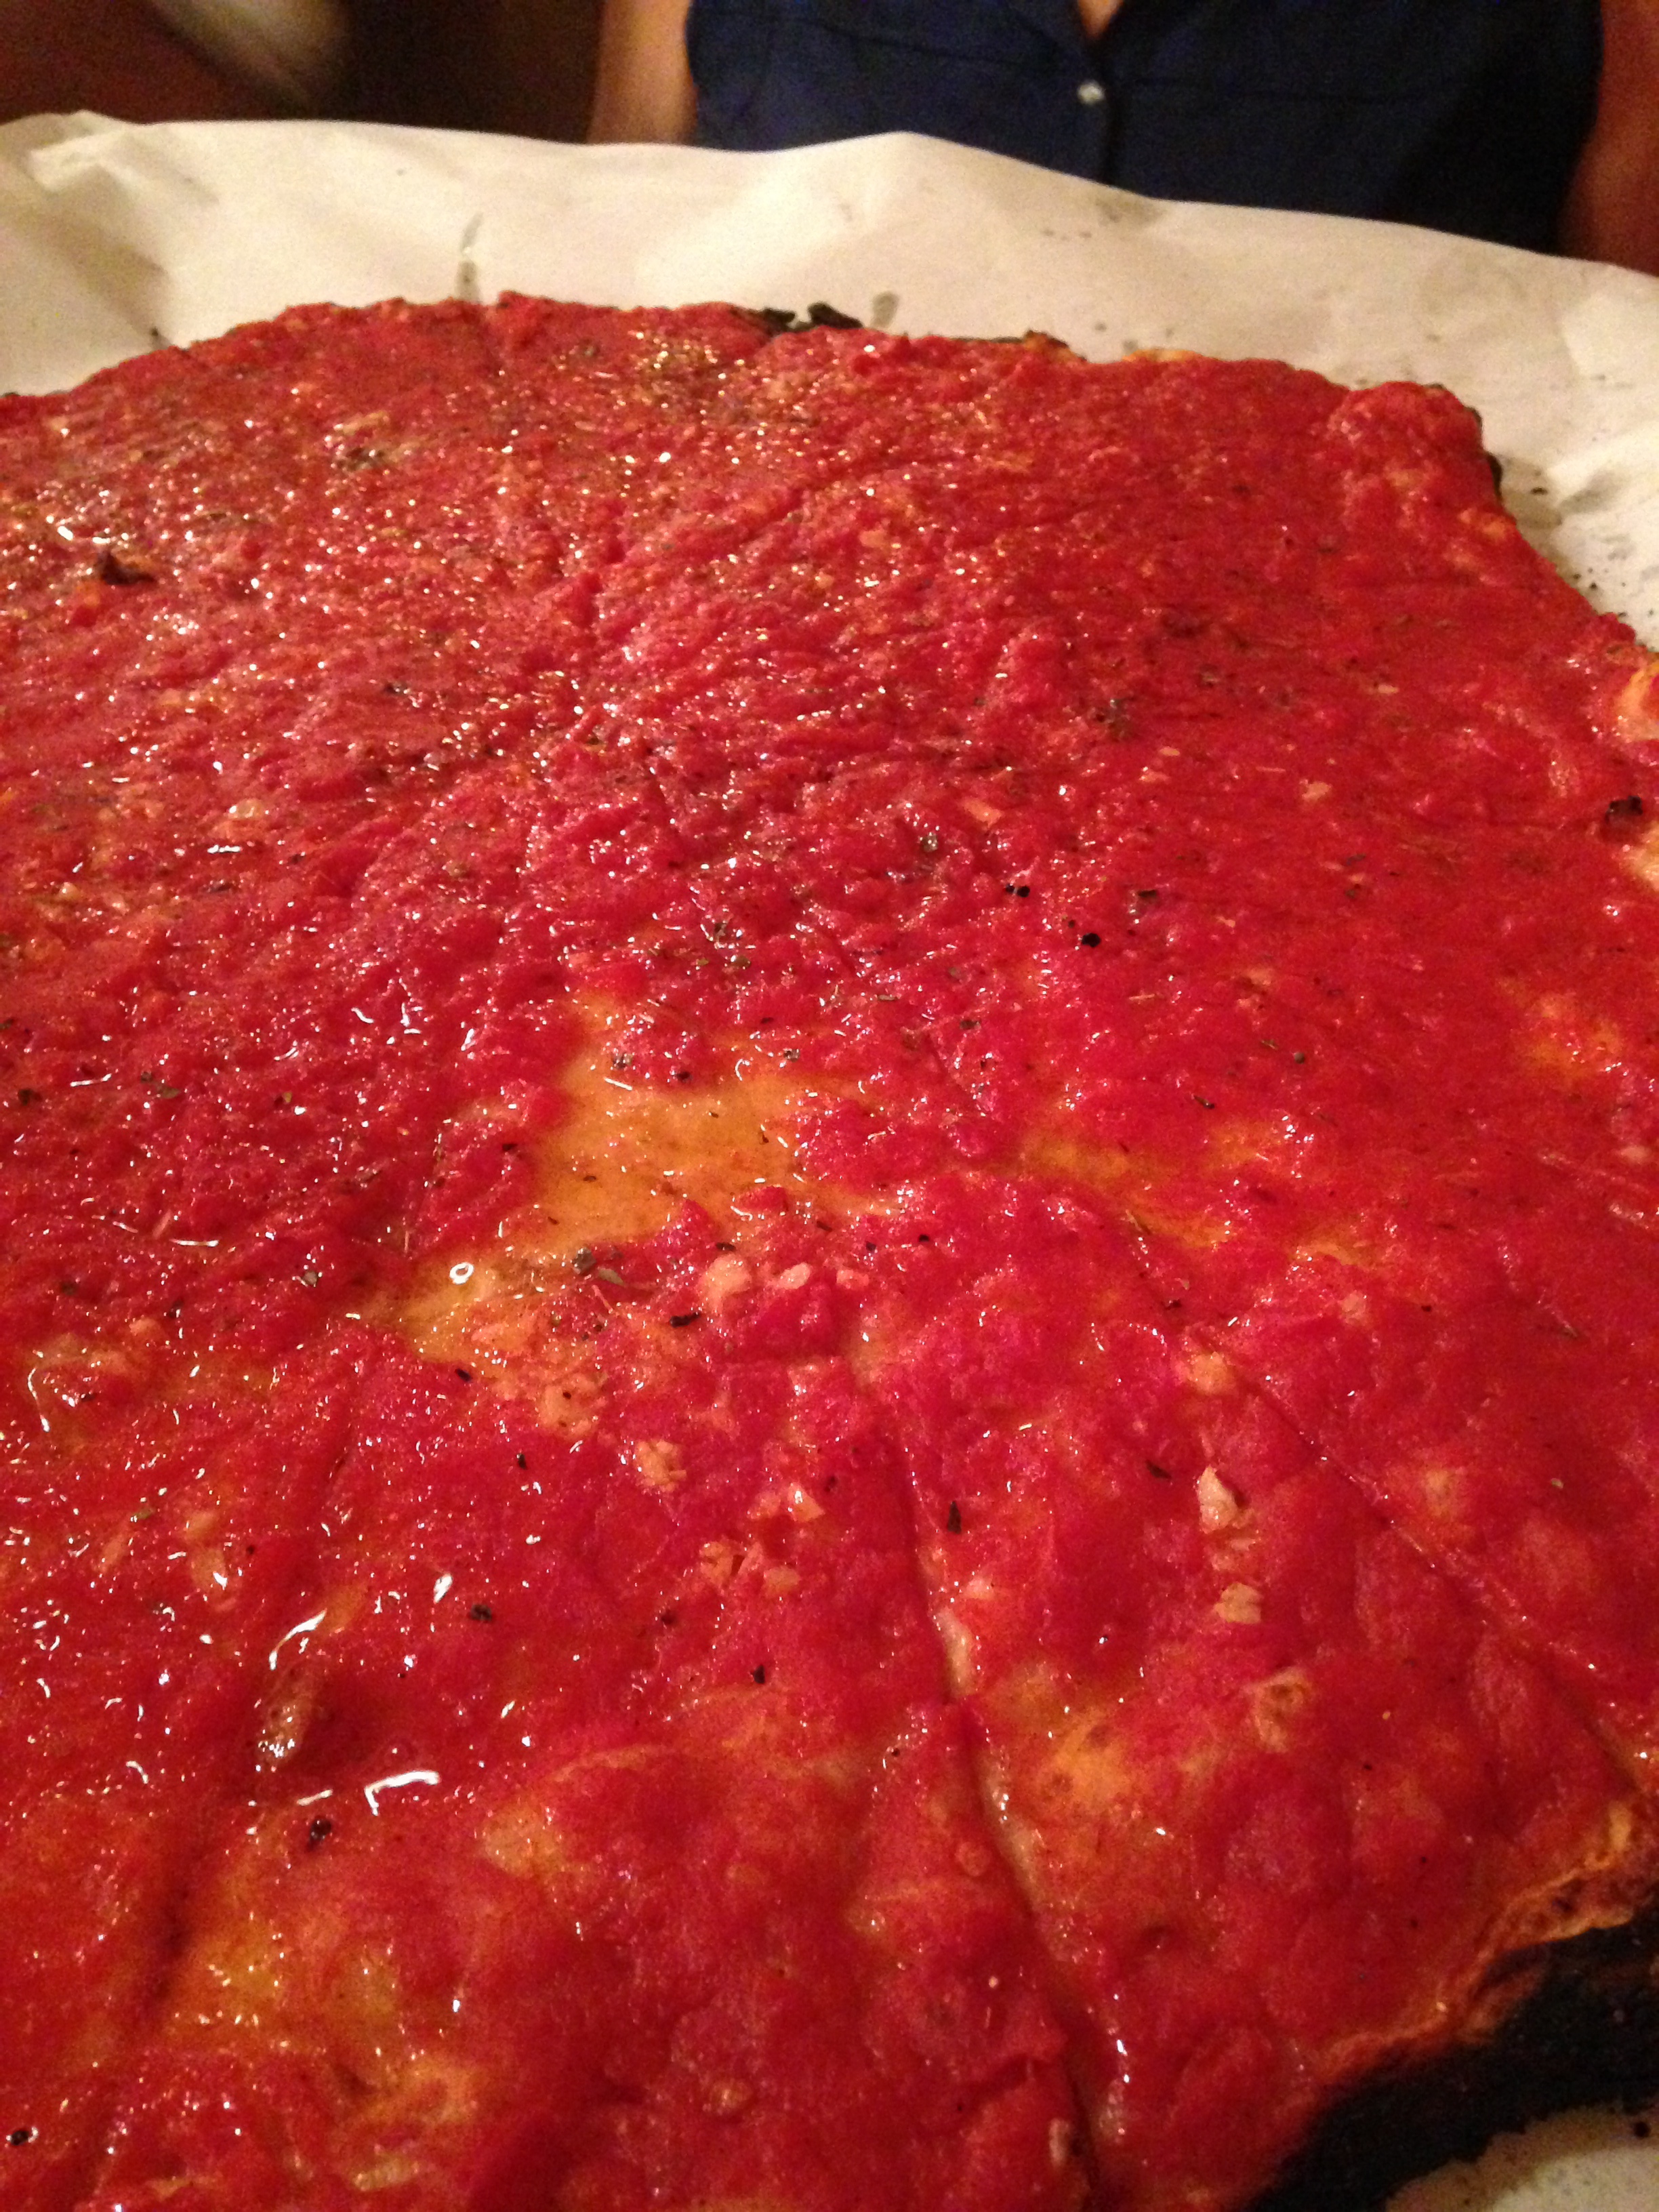
At Christmas time, we had the pleasure of stopping by Pizzeria Mozza in Newport Beach to get our Mozza fix, and since then Mozza has been on the mind—so much so that my dad’s father’s day gift was a gift card to eat there. (Never mind the fact that my dad liked the pizza, but thought it was overpriced!)

My last venture with anything related to Nancy Silverton’s bread making was years ago when I purchased her Breads from the La Brea Bakery: Recipes for the Connoisseur. The fact that the title uses the word connoisseur should have been reason enough not to buy the book, but I did. And I was scared of every recipe in it because it requires a ‘starter,’ which takes 14 days to grow, not to mention you need to feed the starter three times a day for the rest of your baking life. Or it dies!

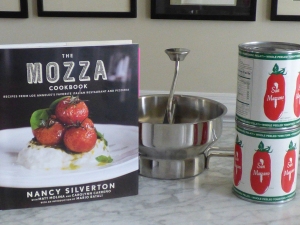
Anyway, despite my trepidation to any recipe related to bread baking and Nancy Silverton, I recently bought the Mozza Cookbook with the lofty goal of making a better pizza to get out of our pizza rut.

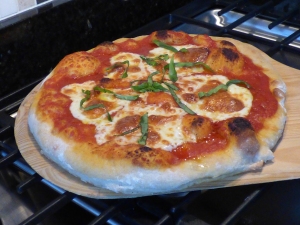
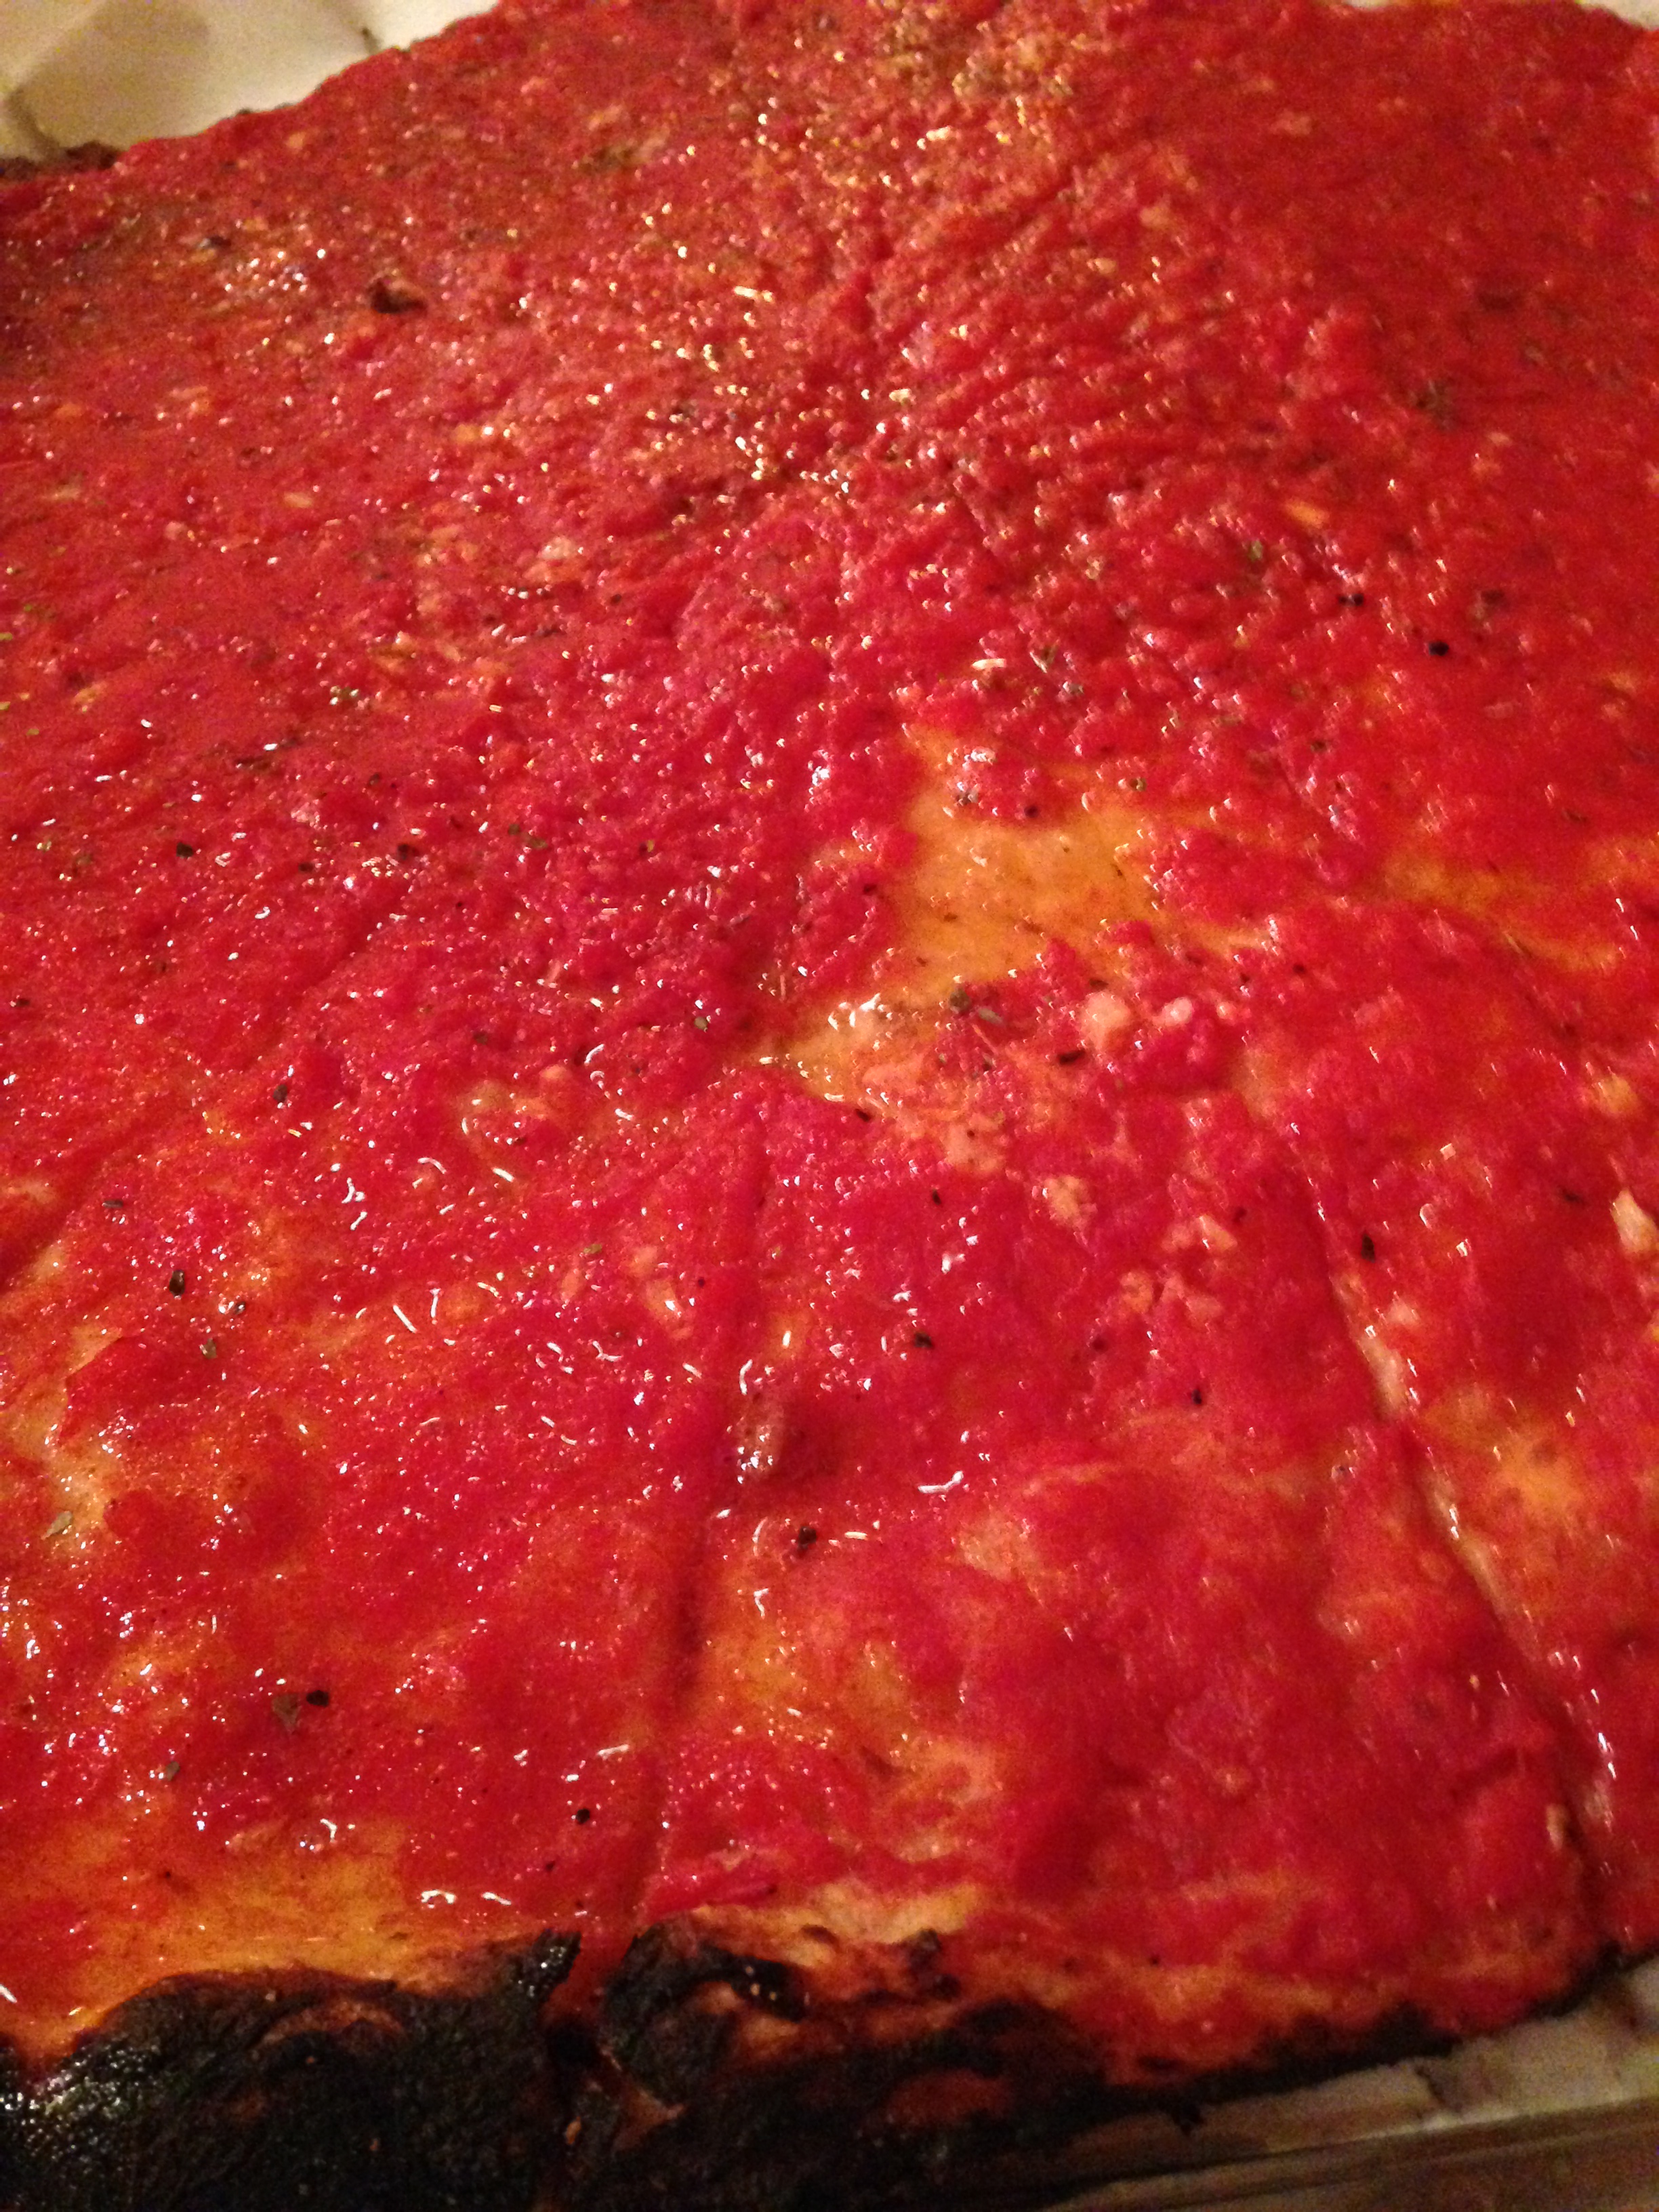
I decided to make the traditional Margherita: mozzarella, tomato, and basil, using the Passata di Pompodoro recipe for the tomato sauce, as the test pizza. Nothing fancy or exotic, just the basics.

The pizza was awesome, but this is not a recipe every Friday night. Making this pizza took most of my afternoon (getting in the way of SUP’ing, yoga, and relaxing), but it was worth the effort. The dough makes six individual pizzas, but I cut it in half and made one large pizza and froze the rest. Next time, I’ll make the dough thinner because just letting it sit for ten minutes before cooking while the oven was heating caused the dough to ‘proof’ a little bit more causing it to be kind of thick crusted, which was not what I was going for. Anyway, here’s the recipe for the dough, the sauce, and the Margherita pizza.

Stay tuned for this weekend’s pizza, squash blossoms, tomato, and burrata.

Mozza Pizza Dough

Makes enough dough for 6 pizzas; each pizza serves 1

Ingredients

•22 ounces warm tap water (2 cups, 6 ounces)

•1⁄2 ounce (1 Tbsp) compressed yeast or 1 tsp active dry yeast

•26 ounces unbleached bread flour, plus more as needed

•1⁄2 ounce (1 Tbsp) dark rye flour or medium rye flour

•1 1⁄2 tsp wheat germ

•1 1⁄2 tsp barley malt or mild-flavored honey, such as clover or wildflower

•1⁄2 ounce (1 Tbsp) kosher salt

•Olive oil, grape seed oil, or another neutral flavored oil, such as canola oil, for greasing the bowl

Directions

1. To make the sponge, put 15 ounces of the water and the yeast in the bowl of a standing mixer and let it sit for a few minutes to dissolve the yeast. Add 13 ounces of the bread flour, the rye flour, and the wheat germ. Stir with a wooden spoon to combine the ingredients. Wrap the bowl tightly in plastic wrap and tightly wrap the perimeter of the bowl with kitchen twine or another piece of plastic wrap to further seal the bowl. Set the dough aside at room temperature (ideally 68 to 70 degrees) for 1 1⁄2 hours.

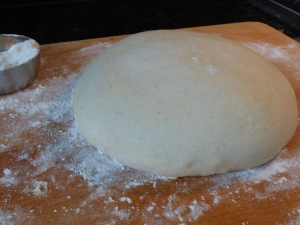
2. Uncover the bowl and add the remaining 7 ounces of water, the remaining 13 ounces of bread flour, and the barley malt. Fit the mixer with a dough hook, place the bowl on the mixer stand, and mix the dough on low-speed for 2 minutes. Add the salt and mix on medium speed for 6 to 8 minutes, until the dough starts to pull away from the sides of the bowl. Note that the dough will not pull so much that it completely cleans the bowl, but if the dough is too sticky and is not pulling away from the sides at all, throw a small handful of flour into the bowl to make it less sticky. While the dough is mixing, lightly grease with olive oil a bowl large enough to hold the dough when it doubles in size. Turn the dough out of the mixer into the oiled bowl. Wrap the bowl as before. Set the dough aside at room temperature for 45 minutes. Dust your work surface lightly with flour and turn the dough out onto the floured surface. Acting as if the round has four sides, fold the edges of the dough toward the center. Turn the dough over and return it, folded side down, to the bowl. Cover the bowl again with plastic wrap and set it aside for 45 minutes.

3. Dust your work surface again lightly with flour and turn the dough out onto the floured surface. Divide the dough into six equal segments, each weighing approximately 7 ounces. Gently tuck the edges of each round of dough under itself. Cover the dough rounds with a clean dishtowel and let them rest for 5 minutes.

P1000055


P1000057

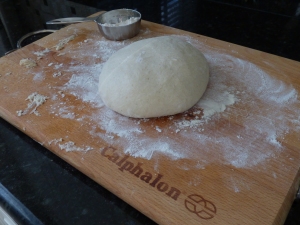
4. Lightly flour your hands and use both hands to gather each round of dough into a taut ball. Dust a baking sheet generously with flour and place the dough rounds on the baking sheet. Cover the baking sheet with the dishtowel and set them again at room temperature for 1 hour to proof the dough. (Or leave the dough on the counter to proof instead.)


Passata di Pomodoro

P1000042


Ingredients

•2 28-ounce cans whole peeled plum tomatoes, including their juices (such as San Marzano)

•1/4 cup extra virgin olive oil

•1 tablespoon sugar, plus more as desired

• 1 scant tablespoon kosher salt

• 1 heaping teaspoon freshly ground black pepper

Directions

1. Pass the tomatoes, including their juices, through a food mill into a large bowl.

P1000043

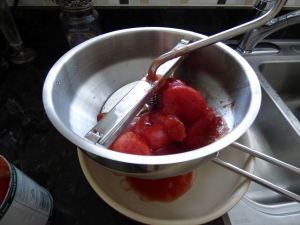
2. Heat the oil in a large sauté pan over medium-high heat until the oil is almost smoking and slides easily in the pan, 2 to 3 minutes. Add the tomato purée slowly as it will splatter when it hits the oil. Stir in the sugar, salt, and pepper, and cook until the sauce thickens slightly, about 30 minutes.

3. Use the passata or set it aside to cool to room temperature, then transfer it to an airtight container and refrigerate for up to several days or freeze for up to several months.

Margherita: Mozzarella, Tomato, and Basil

Ingredients

•1 round of pizza dough

•1 tablespoon extra virgin olive oil

•Kosher salt

•1/4 cup Passata di Pompodoro

•3 ounces low moisture mozzarella, cut into 6 clumps

•Finishing quality extra virgin olive oil, about 1 tablespoon

•fresh basil leaves

Directions

1. Prepare and stretch the dough and preheat oven to 500 degrees. Brush the rim of the dough with olive oil and season the entire surface with salt. Ladle the sauce onto the center of the dough, spreading out sauce leaving 1-inch rim without any sauce. Scatter pieces of cheese over the pizza, slide into the oven, and bake until the cheese is melted and the crust is golden brown and crispy, about 8 to 12 minutes. Remove the pizza from the oven and cut into quarters. Drizzle the pizza with the finishing qua lit olive oil, snip the basil leaves over the top, and serve.

P1000065


Day of the Dead Sugar Skulls


Day of the Dead Mexican Sugar Skulls

skullcloseup

When we used to live in Orange County, California, my sister and I (and later Raj), would occasionally make the trek up to Olvera Street, the oldest part of downtown Los Angeles, via the train. It was an annual trip at the end of September that signaled the beginning of Halloween decorating season and an excuse to buy Day of the Dead items. If you’ve never been to Olvera Street, you need to go. It  makes a great day trip to eat authentic Mexican food and to stroll around cool and hip shops full of Day of the Dead figurines, sugar skulls, and lots more. A few years back, I tried to find a local shop or bakery in Virginia that sold sugar skulls and/or Pan de Muerto (Day of the Dead bread), but with no such luck, I’ve had to create my own.

Making your own sugar skulls is really easy, but it does take time and LOTS of granulated sugar. I only made four large skulls and two smalls ones and used  5 pounds of granulated sugar for the skulls and 2 pounds of powdered sugar for the Royal Icing, but your hard work will pay off AND they last for years!

bigtrio

Sugar Skulls

Ingredients

  • 5 pounds granulated sugar
  • 1/4 cup meringue powder (a must; it helps the sugar stick together)
  • 3 tablespoons of water

Directions

  1. Mix all of the ingredients into a large bowl using your hands until all of the sugar is moistened. It should feel like wet sand.
  2. Pack the plastic sugar skull molds (I purchased a small one at Sur la Table and a large one online) firmly with sugar, using a straight edge to scrape the back of the mold flat–I used a piece of cardboard for this.
  3. Tip sugar out of mold and place on a flat surface to dry overnight.

skulls

sinlgeskull

Royal Icing

After the sugar skulls have been allowed to dry at least overnight, prepare  Royal Icing recipe to piece the two halves of the skulls together and to decorate them.

Ingredients

  • 2 pound bag  of powdered sugar (7 cups)
  • 1/2 cup meringue powder
  • 2/3 cup water

Directions

  1. Mix 2/3 cup water, 1/2 cup meringue powder and 2 pounds of powdered sugar with an electric mixer until icing peaks (about 9 minutes).
  2. Mix icing with food coloring.
colors
I use Ziploc bags with tips for decorating.

Making Your Skulls

  1. My molds are made of two pieces, a face and the back of the skull. With the plain white Royal Frosting, add a small amount to each half and place together, wiping away any excess that comes out of the seams.
  2. Decorate your skulls using sequins foil paper (I ordered this online as well)
tinwrapper
The foil that I used to fill in the eyes and to cover up mistakes I made when decorating.

tinclose

sequins
Sequins for decorating.

cardboard

clochetrio

Mummy Loves You


redo

Mummies are not generally considered cute…unless they adorn your home during Halloween season, doing yoga, riding a cast iron lamb mold, or sitting atop your mantelpiece.

DSC05289
Namaste!
DSC05286
Full Lotus Pumpkin Pose

Here’s an inexpensive and  quick project that you can whip up in no time. After your first one, you will probably find the need to make numerous others to accompany your pack of mummies.

photo-95
Ride ’em Mummy

All you need is floral wire, white cloth  (or rags) torn into strips, and your imagination.

materials

1. Make the armature out of wire.

1

2. Wrap in cloth.

3. Shape the mummy to your preference.

4. Display and smile.

ridem